Introduction
Nim is my favourite programming language. For a long time I've relied on VS Code for my Nim development, since the effort around Nim tooling has focused on that editor. However, JetBrains IDEs have been my development environment of choice for many years, and I've yet to find a comparable experience anywhere else.
Unfortunately, the official Nim plugin for JetBrains leaves a lot to be desired: closed source, its development seem to have stagnated, and it doesn't perform some of the basic features I've come to expect from a JetBrains IDE. I thought to myself: how hard could it be to make my own? I went through the IntelliJ Platform Plugin SDK documentation, and was overwhelmed both by the complexity and richness of the platform. So, as I usually do when I encounter a complex topic, I ignore all the warning signs and jump in head first. This is the story of that journey.
Developing a Language Plugin
We'll use the IntelliJ IDE itself to develop the plugin in Kotlin. To run the plugin, IntelliJ uses a sandboxed version of itself, which is a separate installation of the IDE that loads the plugin. The following diagram shows the two instances of the IDEs, and what plugins are loaded in each.
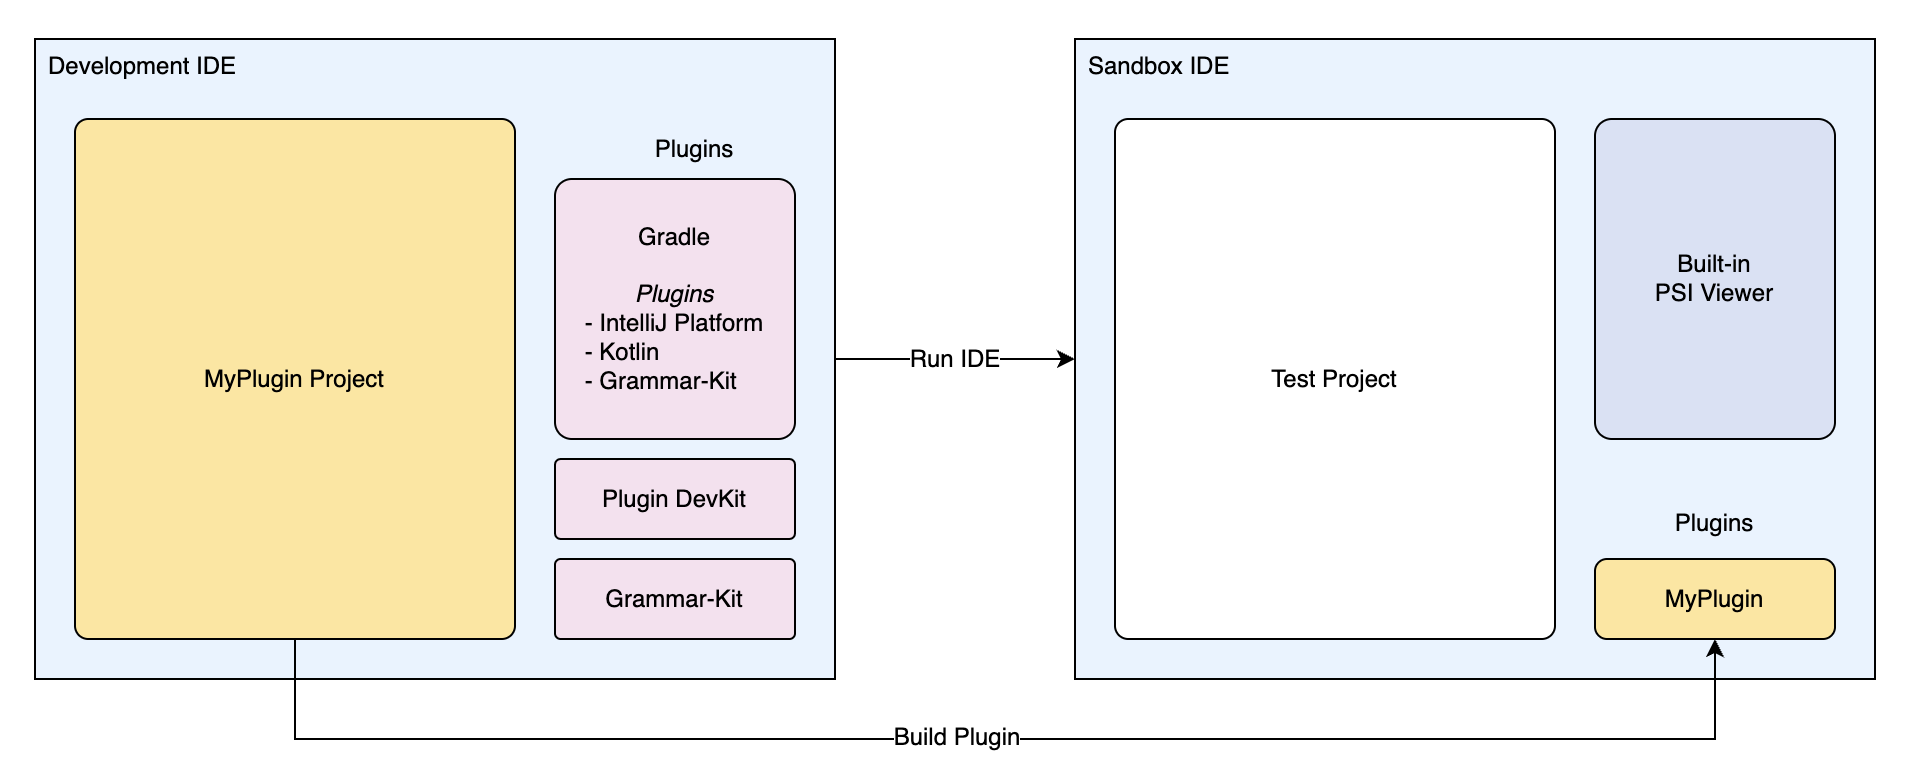
In the development IDE, we have the following plugins:
- Gradle: to manage the project and dependencies. Gradle itself has a number of plugins that are used to build the project:
- IntelliJ Platform Gradle Plugin (for building IntelliJ plugins)
- Kotlin Gradle Plugin (for compiling Kotlin code)
- Grammar-Kit Gradle Plugin (for generating the lexer and parser during the build)
- Plugin DevKit: to provide the necessary tools to develop a plugin.
- Grammar-Kit: to provide JFlex and BNF authoring support, and to generate the lexer and parser.
The sandboxed IDE will host the plugin we're developing, and any other plugins we choose to install. The sandboxed IDE is run in Internal Mode, which enables many additional features through the Tools | Internal Actions menu. It also enables the built-in PSI viewer, which we will use to inspect the PSI tree of the code we're working with (more on PSI later).
In the next section, we'll set up the development environment and create a new plugin project.